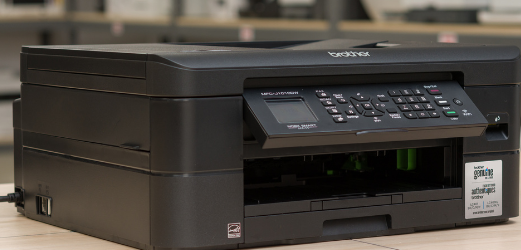
Have you recently purchased a Brother printer? You want to connect it to your computer or desktop, right? If you possess the required abilities, you can then easily connect them. Furthermore, don’t worry if you are a novice and are unsure of how to connect a Brother printer to a computer. You can connect the two devices using the assistance of this guide.
Table of Contents
How to Connect Brother Printer to Computer Via WiFi?
Before You Connect Your Brother Printer
You will need to find the wireless network settings that are attached to your access point or wireless router before you can successfully connect your Brother printer to the network.
There are two specific details that you will need to locate, and these include:
- Network Name (this may also be referred to as “SSID” or “ESSID”)
- Network Key (this may also be referred to as your “Security Key”, “Password” or the “Encryption Key”)
You may need to refer to the specific documentation that came with your router or access point to find out exactly where the Network name (or SSID) and Network Key (or Password) are located on your access point or wireless router.
It’s important to note that you won’t be able to get this information from Brother because the Network Password and Network Name belong to your internet service, not your printer. If your router or access point doesn’t have these details, you’ll need to contact your internet service provider.
The process of connecting your printer to your Wi-Fi can then be started once you have discovered the network information for your access point or wireless router.
As a reminder, if your access point or wireless router uses multiple WEP keys for its encryption, you should be careful to only record the first WEP key.
Quick Steps
You can proceed to connect your printer to the network once you have the necessary information.
Step 1: Switch On Printer
To begin, you must turn on your printer by plugging it in with a power cord.
Step 2: Scroll To Network
Then, head to the control panel on your machine, and press the “Menu” button. Use the arrow keys to scroll through the menu, pressing Up or Down to get to your destination, and continue to scroll until you reach “Network”. Then, hit “OK”.
Step 3: Scroll To WLAN
Next, use the same Up and Down keys to scroll through the menu again until you reach “WLAN”.
When you get there, press “OK” – it should be noted that this option is not present on all Therefore, it is worthwhile to conduct a little additional research to determine whether this applies to Brother machines.
Step 4: Setup Wizard
Following this, use the Up and Down keys to scroll a third time until you reach “Setup Wizard”. Once you find this, click “OK”.
Step 5: Enable Wireless Network
Shortly after this, “WLAN Enable?” will appear on the control screen. Press “Yes” to select this, and enable the wireless network – this move will kick the wireless setup wizard into action.
The printer will start looking for your Wi-Fi network and will give you a list of potential Network Names (or SSIDS) to select from as it does so.
Step 6: Scroll Through List Network Names
Use the Up and Down keys to navigate the list once it appears until you find the Network you need, which will be the SSID you earlier discovered and noted. Once you have found the necessary network, click “OK”.
Step 7: Enter Password
The next step will depend on your machine – if you are using an encryption and authentication method that asks you to use the password (or Network Key), then you will need to enter this password, click “OK” to apply, and then press “Yes” to ensure that all settings are applied.
If, on the other hand, the authentication system that you are using is Open System, the encryption method that is selected will be “None”.
Your machine will then try to connect to the Wi-Fi network that you selected from the menu earlier – if this is successful, the screen will display a message saying “Connected”.
Your printer will automatically print a wireless connection report for you if the connection drops. This will include an error code that you can use to identify the issue and start troubleshooting a fix.
Step 8: Drivers And Software
A final step that is all too frequently skipped but which will determine whether or not your printer is actually usable must be completed after setting up your printer and connecting to Wi-Fi.
Try to keep in mind to prioritize doing this because remembering to do it early can save you a lot of stress and headaches, in the long run.
Before using your Brother printer, you must download and install the driver. The driver is the software that enables your computer to translate data into a format that can be read and understood by your particular printer.
Keep in mind that every printer has distinct hardware and software, so it’s critical that your computer, laptop, or other device be able to give each individual machine the instructions it needs. The printer driver’s function is to perform this.
Windows users can download drivers by heading to the “Downloads” section of the Brother website, finding your item, and selecting the option to download the “Full Driver and Software Package”.
You will receive complete installation instructions along with your download, which you can use to install your drivers and start using your printer.
The process is similar for Mac users, but you will need to download the options market “Full Software Package” from the “Downloads” section of the installation instructions can also be found on the Brother website.
In some cases, the “Full Software Package” may not be visible; as an alternative, you can download the “Scanner Driver” and “Printer Driver”, and then follow the instructions on the download page.
Printing and network connections are both possible with AirPrint.
Here is the video from Youtube to teach you how to setup WiFi and print wirelessly using your PC/Laptop #Brother DCP-T420W.
How Do You Connect Brother Printer to Mac?
All Mac users can use the listed instructions to connect any type of Brother printer to their Mac devices. Maintain closer proximity between your Mac computer and printer.
- Go to the Brother Printer Software Package page in a web browser.
- Go to the “Downloads” folder and double-click the Brother printer driver file once it has been downloaded to your Mac device.
- The Wireless Device Setup Wizard can be opened by opening the utility window and searching for it.
- Go to the Wireless Device Setup Wizard. app and select it.
- Complete the remaining steps of the setup to connect your wireless router and Brother printer.
- Start by enabling the connection and turning on the wireless router. Check to see if the Mac computer has wireless access as well.
- Pick the SSID you created in the earlier steps. Your device and your wireless router/access point will establish a link.
- If your device is already connected via wire to a WiFi network, move on to the following step.
- After turning off the Editor Lite LED, launch the P-touch Editor and select a printer from the drop-down menu.
- You can now wirelessly edit and print labels from your Mac device, then print spreadsheets and images as papers.
How Can I Connect My Brother Printer to My Computer With Printer Driver?
Check the network name (SSID) and password (Network Key) for your wireless router/access point once more before you start.
- Print and Scan in the Windows 10 Search Box.
- the drop-down menu, and then select Printers and Scanners.
- A drop-down menu will appear; choose Add a Printer.
Note: Before choosing the printer and following the on-screen instructions to finish the installation, let the scan finish.
- If your Brother printer does not exist, pick “There is no mention of the printer I want.”
- Connecting a printer to a computer (laptop) requires a USB cable.
- Click Next after choosing the last choice, “By using manual settings, add a local or network printer.”
- Selecting Use an existing port then pressing the Next button.
- Click Next after selecting your printer’s model number from the right menu and your printer’s manufacturer (Brother) from the left menu.
- Click Next once more after making any necessary changes to the Printer Name.
- Print a test page to make sure the Brother printer is connected to the device.
- Select Finish from the menu.
Your Brother printer will be connected quickly after this process.
How to Connect Brother Printer to Computer With Cable?
- Make sure the printer is turned off before connecting the USB cable.
- Connect the USB cable’s printer end to the USB port on the printer.
- Connect the other end of the USB cable to a USB port on the computer.
- To turn on the printer, click the Power button.
- Once you have the paper loaded, print.
Conclusion: Connect Brother Printer to Computer
We hope you have learned all the connections your Brother printer can make to your various operating systems, including Windows and Mac, after reading this entire guide. If you still are wondering how to connect Brother printer to the computer in some other ways or How to Connect Brother Printer to Wifi, reach our experts through the comment section or Live Chat.
FAQs
Why is My Brother Printer Not Connecting to My Computer?
Try disconnecting and reconnecting the USB cable from both ends. Reconnect after disconnecting your computer and Brother device. (If a USB hub is being used, take it out and connect your Brother device directly to the computer.)
Why Can’t My Computer Find My Printer?
Restart the printer and try once more. Disconnect the printer from the outlet. You can try plugging it in again to see if it works this time. Verify that the printer is connected to your computer’s system or that it is configured correctly.
How Do I Reconnect a Disconnected Printer?
Reinstall your printer:
- To access printers and scanners, go to Start > Settings > Bluetooth & devices. Navigate to Printers & Scanners settings.
- Ensure that your printer is turned on and connected. Follow the on-screen directions to add your printer by selecting Add device next to Add a printer or scanner.